Search This Blog

Wednesday, October 28, 2020

My Eyes are on You


 Not making any excuses for my delay in posting. Suffice it to say, I am here now.

Patience, 8x8, oil on board
This cat belongs to a friend's cousin that we stopped by to visit while on our road trip through Ohio last summer. He would not come down any further than the landing to the basement. He just sat there and watched every move of his owner, Gigi. I took a number of shots of his different looks, but I liked this one. It was almost as if he was saying, "You know I don't do basements..." or "are you almost done?" He definitely was communicating. I haven't come up with any great name for this piece so if something strikes you, let me know. His name is Dippity.

I am still fascinated with cats for some reason.

Tabby Cat, 8x8, oil on board

I hesitate to post this first image I had planned on using for this post. Something stayed my hand from making it live, as there were a few things I saw when putting it up for view. Here is where the new title comes in. I am not a patient individual. I started this small painting in June for Pete's sake. It should have been done within a few days, not months! The first flaw that struck me was his paw that is underneath him. Ugh. What the heck? Stuck out like a sore thumb. Even if the image had his paw looking somewhat deformed, the value and shape were off. The second thing I noticed was that the shadow side of his head did not join with the shadow side of his body. Both easy fixes. 

The second image was also taken with different lighting. One is a tad light and the other a tad dark. Posting the photographic image of my work is like having a second pair of eyes. It is always very helpful if not always welcome!

Saturday, August 8, 2020

Wildflowers Revisited

Years ago, when my children were young and we were getting them started on hiking, I began to draw and paint wildflowers during our many pit stops along the trail. It was a way to help me learn the names of the 100's of flowers that are found in the Rocky Mountains. This year is a banner year for wildflowers and I decided to pick up where I left off in 2003, the last drawing I did and when I had put together a little book of my drawings.
My first attempts to draw small after drawing with a paintbrush on large canvases seemed difficult for me. I felt the drawing was way off and stilted.  The relationships were off between the leaves and the flower.

potentilla, false start
Cinquefoil (pontentilla) 2003


I redrew flowers I knew I had done before just to see how much my style might have changed in the intervening years. I would say it has changed quite a bit! To me I think the older version would be better for keying into and identifying the flowers in the field.

watercolor of low penstemon
Low Penstemon, 2020
This low penstemon I did the other day I had to lay on my belly to see it at eye level. I made sure that there was no flora that I would crush, just a dusty dry gravel. The trail was running between the flower and me.
Low Penstemon, 2000

Here is another one I thought I had done before and I wanted to see which was the 'better' of the two. Lo and behold, I had not done it before! This is called Butter and Eggs and I thought it was a Golden Pea. Obviously, it has been awhile since I have seen the golden pea! They are alike in color, height and similar in structure. Otherwise, very different.

Butter and Eggs, 2020

Golden Pea, 2000

I had a good illustrative style going after doing so many every summer back in the day. I need a bit more practice before I will use any of my newer drawings. They are too different and need some refining. The one exception might be this Sego Lily. Amazingly, this is one I had not done before. They were in two colors, white and pale pink. I think I prefer the drawings without doing them in pen. I will leave them done in pencil in future. Your thoughts?

Sego Lily, 2020

I am enjoying using this renewed interest to get me up hiking in the high country. It has been a long time since I have gone hiking this much and it has been good for renewing my soul, if not yet my drawing ability!

Saturday, August 1, 2020

Found: Use for old blank postcards

I have been helping a friend from my church, whose husband died recently. She had asked me to help her with his art supplies as she had no clue what to do with them or even what he had. What he had (has) is a mini art supply store! It reminded me of when there was a small store set up at the Art Student's League of Denver when they were located in LoDo. Drawing pads, watercolor pads, pastel paper pads, of all sizes and brands. Pencils: colored - including a 132 Prismacolor boxed set; Derwent - watercolor pencils and regular colored pencils; pastels; 100's of tubes of watercolors as well as travel sets (6); a pochade box as well as 3 other easels. ETC. Suffice it to say, I, in my entire career, have not used or needed the amount of supplies this man had. I am still using the same Pelikan travel set I bought as a student in the early 1970's which needs to be held together with the rubber band. I have replaced one color tray (olive green) in all those years. I can see why she was overwhelmed and had not idea where to start.

I also came across these old blank postcards. I have not checked to see their value and maybe I should before continuing...but I remembered reading about an artist who was painting on index cards. I have a friend who has COPD and is house bound that I have regularly been sending postcards to. In an effort to bring a smile to her face I keep trying to find a new way to do this. She received the first attempt of my drawing on one of these cards. I did not take a photo of it unfortunately. I wasn't sure how watercolor would do on this old card stock, but I need not have worried. It works just fine. So at the last minute finished my drawing of a cone flower in my garden with colored pencils.

The next one I did was of a day lily. I did not think it worth keeping but then changed my mind. I made it for my friend whom I have been helping. I also wrote around the edges of the first card I did.
Here is the last one, another cone flower, this time in watercolor. I have other flowers in my garden but I do tend to want to be in the shade, so depending on the time of day I go out determines the subject.
It is not written on yet, as I have not decided to whom it is going. I want to do a few more so that I have more choices. So far, I am using up those that have corners bent or in the case of this last one, it had a start to a name written on it so that I think will decide the recipient. May as well go with the flow, so to speak.
I am enjoying this little endeavor as a way to be creative; be enjoying my garden and spreading a little sunshine. We could all use a little love in these unsettled times.

View from the Uffizi

View from the Uffizi, 30x30, oil on linen
Wow! I just realized this painting has been 2 years in the making. How is that possible? A real challenge for me. It seems to be finally at a place where I like it. After many false "finishes"...


The block in
I love the block in process and felt this really got off to a good start.

Continuing to build
Mid point.

Thursday, July 16, 2020

Dance of the Jelly Fish

Dance of the Jelly Fish, 16x12, oil on linen
This painting comes from a Facebook 'challenge' a month or so ago that some friends of mine were throwing around. The first subject was octopus. I so wanted to paint an octopus but I have no images of my own of those amazing creatures. Searching online did not help me find what I was looking for. So, after those paintings were posted by those who knew what they wanted, the next topic was Jelly Fish! I had a number of images I took when I went to the Monterey Bay Aquarium.  I went there a few years ago with my son on our road trip up the California Coast. I am sure it is the lighting of this exhibit that makes the colors so vibrant, but it was captivating!

I thought this being a fairly small piece it would not take me long, which it didn't. But getting it to the satisfaction of my son (and he was correct) has been a struggle. In the original image the jelly fish are fairly dark and almost have a solid feel to them, which I of course, captured. He just could not like the painting because of that. So I did my best to rid them of the dark lines and solid feel trying to make them more ethereal. Not something I do well with. I am so an outline, graphic person in how I see. He has not seen this last version yet, but I am thinking it will 'pass muster.' Finally!

I do love the colors and it was fun to paint something totally different for me.

Monday, June 22, 2020

Rock Study

On this Rock, 11x14, oil on panel
I went up painting this past week with a few old friends and now some new friends, as well. One of the women offered her garden in Evergreen, about a 30" drive from my house. Even though it is not that far from Denver, it was still lovely to get out of the city and into the foothills. On top of offering us her property to paint on, she also fixed us lunch!

Her garden, being at a higher elevation, had plants blooming that left my garden in the past few weeks. ie her Iris were at their peak and mine peaked at least two weeks ago. At any rate, there were these lupines growing in the crack of where the yellow straw meets the dark under-hang of this boulder. I struggle with rocks for some reason. I found out that I am not alone in this as none of the women I was with like to paint rocks...They all painted flowers or a path including flowers. I decided to take this opportunity to just study rocks. To do this, I was looking at them abstractly. Looking for shapes, values and color. Whether the lupines found their way in or not was not a concern of mine. It took everything in me not to wipe this study off as has been a recent pattern of mine. I don't want more paintings lying around. I will normally take a photo and then wipe the slate clean. I won't say I am glad I kept this painting but there is something about it I like. It is strong graphically, I give it that! And I may add the lupines. TBD.

The panel I used here had been painted on so many times prior to this one that the texture was almost a hindrance.  It did slow me down. This may be the last time I can use this particular panel. So be it.

Friday, June 5, 2020

RIP Fritz the Wonder Dog

Fritz, 20x16, oil on panel - Died 6-4-20 at 15.5 years of age
Yesterday was a sad day, but yet a relief. Fritz finally let me know on Wednesday he was ready. I found a wonderful Veterinarian who came to the house. This is all he does, which takes a special individual. And he was very good at it. A big shout out to Dr. Jason Cordeiro. This was my first experience with home pet care, but I would not do it any other way now. I was able to hold Fritz as he passed out of this life into the next. He is missed and will be missed. He was a little shit in a many ways, but he was my little shit. He had such a personality and was a verbal dog, letting us know what he thought on the subject. The past year he was showing his age, but still, for the most part, vibrant. The past several months I knew the time with him was coming to an end. Knowing and accepting are two different things...please forgive me if I wasn't listening to as closely as I should have. With much love.

I did this portrait of Fritz 6 years ago. It was for a class project where texture was the theme. I tended to paint with a smooth surface and this was to try and break me out of that mode. I thought I might be able to add more paint texture to his hair, which for me, was a help. I will never be an impasto painter but my paintings are no longer smooth to the touch.
Fritz, quick sketch, 9x12, oil on panel
I could only find this one image of a quick sketch I did of Fritz many years ago. (looks like the paint was still wet when I shot it) He was waiting for Richard to come home. He had heard his cab drive by so had his eye on the gate. This quick sketch was painted in less than 5". Fortunately, I had the paint already on the palette as I had been painting in the garden just before I saw him sitting there so intently.

Monday, June 1, 2020

Continuing the Farm/Ranch theme -the Big Barn

Big Barn, 9x12, oil on linen panel
Continuing not only the theme from my last post, but also another uninspiring title! I lack creativity in that area...I "finished" this painting months ago and I let it sit all this time because I wasn't sure what I thought about it. Still not sure what I think about it. So I am throwing it out there for commentary or critique.

Then I decided I could not post this image. In life it looked better - in a photograph - all I can say is ugh. Back to the easel it went. The first thing that I did, even though it was the clouds that I dislike so much, I pushed the mountain back a bit. I felt the color was too strong. Next, the trees on the right. The far right one especially reminded me too much of Charles E. Burchfield (his trees are very stylized). Which was a distraction to me. Still avoiding the sky, I did a few adjustments to the foreground. None of this took very long as the structure is in place and it is a small painting. It continues to look better to my eye. Then I decided to redo the barn; the value of it wasn't off per se, but it needed something. Finally, I had to face the clouds. I have been studying clouds, especially when they hang over the mountains. The bottoms of the clouds here really can get very dark. So the value of that dark blue wasn't the problem. Nor was it the color. I discovered it was the  middle value that was the problem. That middle value was too light. And I had tried too hard to add pinks and yellows to it making the clouds look dirty.
Big Barn, 9x12, oil on panel

Usually, I prefer to put the 'New! Improved!' image at the top of the page...today I decided to leave what was originally going to be the posted photo and text where they were. I have taken more time on this silly little painting than I do on some of my larger paintings. I just don't paint this small much anymore. It took 5 days of taking photos, taking it back to the easel before I am done with it.

I went out to paint in my garden yesterday on an 8x10 panel. It was pure torture..

Friday, May 22, 2020

Hello from the Twilight Zone

Gosh, it has been over two months since my last blog post...feels like confession time. I don't know about you all but it has been difficult to focus during these "stay at home" times. Not that I have been good about staying in place, but the whole tone of the time is so disconcerting. I won't go into all that except to say, painting has not been getting done, thus nothing really to write about or post. It isn't that I haven't painted at all, just not motivated overall. I went out to Washington Park last week and yesterday just to get outside with those willing to be out and in public painting. Nothing done that I want to post except that yesterday we had so many comments from those stopping to say how nice it was to see artists back in the park and activities to make it seem more 'normal.' A young man took a bunch of photos of us at work. He said he would text them to me but I have not received them yet. I am sure it will be awhile as he will need to process them; ie he was using a real camera not a phone.
Farm Buildings, 12x24, oil on panel

I will share this one with you. I took the reference photo at Hidden Mesa Open Space outside of Castle Rock, CO. I am calling it Farm Buildings unless someone can help me out with a better title. Y'all are way more creative in naming my paintings than I am.

It was just over three years ago that we (Plein Air Artists of Colorado) were invited to a local Parker artists studio for the morning and then on to paint plein air as a group. I did not choose to paint this scene at the time but I came across the image recently while browsing for inspiration.

As usual, the block in for it really excited me and then,  slowly, but surely, little by little,  voila! I do believe it is done. Don't you like the white house smack dab in the middle of the composition? I think it works due to the red outbuildings off setting it. What do you think?
Farm Buildings blocked in

Mary Dunn and Linda Petrie Bunch, Washington Park
Here are my compatriots out last week. We all painted the same scene looking west across the south lake. It was a gorgeous day both days I went out. 

Friday, March 13, 2020

Clay Mono Printing - Part 2

Sorry to all those who came here with most of the images missing~ I am not sure what happened but I do think the images are showing up now. How embarrassing. Thank you, CLC, for letting me know!

Here are individual images of the prints I pulled. You just get revved up when the class is over. We had one person who had taken a workshop last year and he said at the end of the weekend that he was finally starting to grasp the possibilities of what he could do with this medium. Mary Lynn said it took her at least 4 workshops before she developed her own style. I think I have a pretty good idea of the direction I want to go in the next class I take. It was a good break from oil painting and gave me a greater understanding of history and layering.
First Print

Here is the first print I did. I learned after this print to not jump right in and cover it up with kaolin. That there was a possibility I could pull either a second print or using scraps I could maybe pull sections from the plate into a new print. It is a learning process. In this one I used some plastic stars, netting, a foam bar with 3 holes to use as stencils. The blue swirl is called a transfer. You squirt the color onto newsprint; let it dry; then transfer it to your plate spritzing it with water to release the transfer. The dark yellow is also a transfer. The black is dried kaolin (ie chalk) grated through a strainer onto wherever you want it. It is such a fascinating way to work.
2nd print/plate painted on
2nd Print, three sections reprinted. Not as strong color
On these scraps I went back over the plate without adding anymore pigment. I wanted to see what would come up. I did not put but two coats of the solid color on top of my stencils. The more layers you lay down, the more you can get out of it. So notice on the third print over, the blue has come up from the first days print with the stars. It is crazy how the prior 'plate' comes through on successive prints.

On the second full day, I worked on two plates. Michael had prepared a second plate for all of us, but Mary Lynn was generous enough to share one of her 8x8 well used plates with me. With each use of a plate, history is being made. I will attempt to show you what that means. On my first try, I laid down ochre as the background. The plate came with that grayish mauve color. It doesn't look like I put down any layers of kaolin between that and the ochre. I then put that raspberry color over that and made the polka dots etc on top of the ochre. I printed without the plate being the correct dryness/wetness. This was way too wet. So it came out without any real crispness to edges and lots of the mauve coming through. along the edges you can also see different colors coming up.
8x8, printed while too wet

Here is the same 8x8 plate as I thought to recreate the first print I did, but I then went off on a tangent. You can see a few different patterns peaking through. I cut the circles out of newsprint as well as a frame and then went over it all with the white kaolin. Well, someone decided to help me and put a second coat of the white covering up my little newspaper circles. I had neglected to take a photo before adding the white overcoat so I would see where to look to pull up the circles! Hence the scrapes through the image as I tried to locate them. Yet, I think it needed those scrapes. The whited specs are from the clay coming up from these scrapes. I just added them back in to the mix.
8x8, second attempt, new background
8x8, second attempt; second print pulled

I can't decide which way I like this set of prints but you can see from this second pull from the plate how much is coming up from previous prints. Even in the scrapes I did, there is purple coming in! I did not use purple! And see the pink dots coming through from my first attempt on this plate that didn't come through on the print right above this one. It is so much fun to see what happens. It was a fascinating journey where you must leave your expectations at the door.

Now that I have had this little introduction I may just have to do it again. I now have some ideas on direction knowing a little more about the process. I am sure there is still so much to learn and experiment with.

Here is the link to sign up for the summer classes if you are so inclined. I am sure there will be more weekend workshops come fall.

Thursday, March 12, 2020

Clay Monoprinting - Something completely different! pt 1

Father Brian with art displayed by a young artist who is also the receptionist 
I met this delightful woman who was coordinating an event at a local church. The young and energetic priest, Father Brian, decided to host an evening of celebrating beauty. It included four musicians playing chamber music (one of the musicians is in the parish) and artists displaying their work. Most of the participants of this evening celebrating beauty were either people who worked at the parish in some capacity or related to someone who works there. Except me. I have a friend who works there and she gave my name to the event coordinator, who is also an artist. Fr. Brian gave a short, maybe 20" talk on why beauty is important in our life and that we need to support those that create beauty, whether through their music, their art, architecture, etc. Wow! Was that ever a breath of fresh air. That beauty nourishes our soul. Indeed!
My table with St Joseph
Mary Lynn had clay mono prints displayed at her table. I was intrigued. I had never seen any print of any kind that looked like these. I could not wrap my head around what or how do you print with clay?? After the event I wrote her a thank you for her hard work and success and for including me. I also told her I would like to know more about this process if she would ever be willing to let me observe when she was in her studio doing this mysterious printmaking technique! I had looked it up online so I had a vague clue, but really more questions than answers. In response she sent me a flyer of an upcoming 15 hr CE credit workshop over three days. One spot was left out of the 3 weekends it was offered. I took the spot. Not surprising with CE credit being offered, most of the students were art teachers, taught by two retired art teachers.
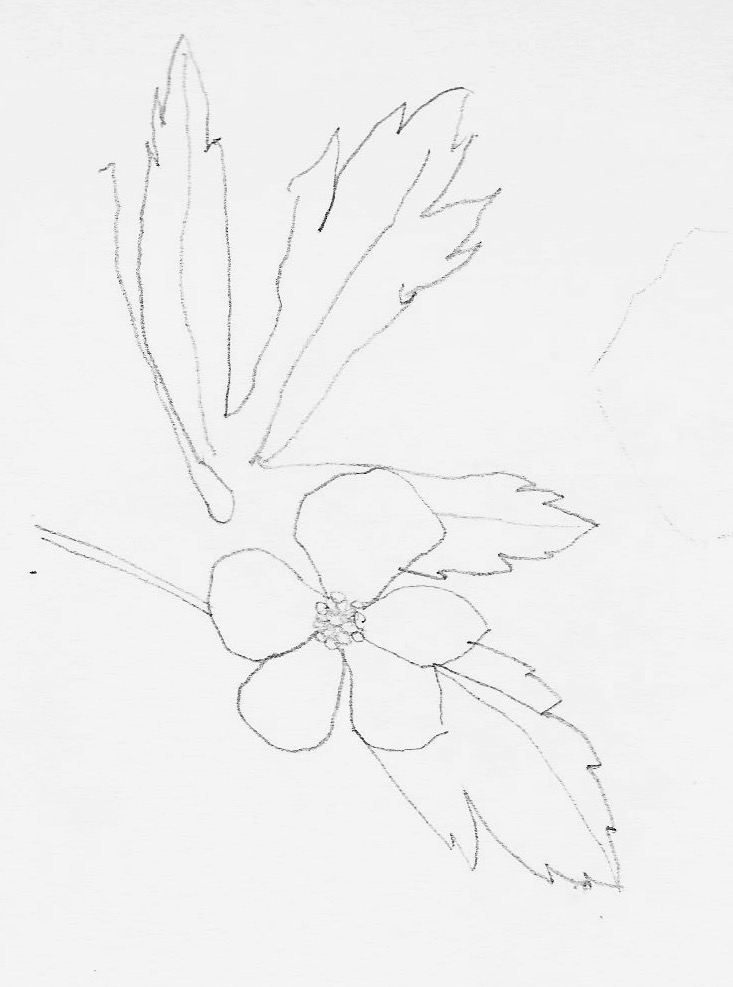
'Blank' Canvas, or clay plate covered in kaolin
This is the start of our first full day. The evening before we had built the frame (16x20) and pushed the clay into the frame to make a flat surface. After getting the clay rather flat, 3-4 coats of kaolin (a clay often found in facial masks) was brushed on. Each coat had to dry before applying the next coat. It is now ready to apply color and texture and the tools are lined up for that. I did not take enough photos in between and for that I am sorry. So we jump from plain plate to showing the results down below of the first set of prints. Mine is the one with stars. I will provide better photos of what I produced in part 2.
Samples of first days efforts - in print
 In creating a print, I had no expectations. I had grabbed a pile of objects to create texture and patterns. I had mixed up the teal and raspberry pigments and then used colors from other students at the table. As newbies we always mixed more than we needed... Of which very little actually shows up in my print. I am showing Mary Lynn's demonstration below. She had her plate covered and is now adding decals. The whole thing will be covered in a solid color of white and the color will only remain where the decals or stencils are.
 The resulting print that Mary Lynn did is below in the upper left hand side.  The prints are printed on a plastic fabric similar to Pellon in texture and content. ie plastic. I could not figure out in the videos I watched when the called it 'fabric' yet it look and acted like a paper you would use in printmaking.

Also in the photo above is my second print done on Day 3. It takes time to build up the layers you need to pull a print. Each layer of color you put on has to dry and then be embedded. Any texture or pattern or decal or stencil all have to be embedded using your roller and newsprint. It is a process. Most of us had two plates we were working on so that while one was drying we could be creating on another. In the first image below I am considering doing what Mary Lynn had done in her demo using stencils I had made. Since my background was mostly shapes I made my stencils to recreate those shapes, remembering that where the stencils are, the original background will show through. Everything else will be covered. I used a denim blue as my cover coat on this one.
Did you notice the lined newsprint used in elementary schools is my stencil material?
I also used post it notes of varying sizes in the first layer.  

Here I am pulling my print after much rolling and pressure using the back of a spoon to get the transfer to be as much of the pigment as possible. The corners and edges tend to dry faster than the main plate so it takes much spraying of water and more pressure to get the color and edges to be as clear and sharp as the original.
What I learned is that you are only limited by your imagination! If this is of any interest to you there are some upcoming workshops. They do fill up fast. Contact Mary Lynn or Michael Cellan, who is the main instructor, Michael Cellan's Great Art Workshops, 2415 Tremont St, Colorado Springs, CO 80907. These workshops are held in Littleton, Colorado.

Thursday, February 27, 2020

Fall is the Wrong Season as we see Spring on the Horizon

Smith Lake-Fall Reflected, 18x24, oil...available

As I walked the park this morning there was decidedly Spring feel to the air despite the temperature which was 19 degrees. The air was clear and there was a bird singing that heralds the change of seasons. That is in stark contrast to the painting I am posting today. I started this painting in early fall last year (or could it have possibly been the year before?) and finally was motivated to go for it. I never had gotten far, and had somehow lost all interest in. It is not my usual style, which is on purpose. I would like my landscapes to be more abstract which is how I started this painting but ended up being more loosely painted. I would like to believe I was listening and dancing to some lively music, but that was really not the case. More a wanting to do something completely different for me.
I have walked this park so many times I am surprised that there is no groove to prove it!

Friday, February 21, 2020

The Old with the New


Semur Street Scene with Car, 14x11, block in
To start of this new year of 2020 I am posting an updated painting I started back in 2015. Here is the original block in from that year. Not bad at all. I did a number of paintings from that 3 week trip to France. In my quest to have better paintings overall, I picked this painting to update. Surprising to me was that I had no updated images of it since the block in phase and I had considered it 'finished' at some point in time. So I did  not think to photograph it before redrawing it and starting in again. Below is the latest restructured image. Not too many corrections overall. I wish I had looked at the original block in before starting over as I see plenty of things I like in it.


Semur is an old walled town in Burgundy, France. I found so much to like about the winding streets and old buildings. We only spent an afternoon walking around this town yet I have done at least 5-6 paintings from there. It is amazing how many centuries these houses have seen, yet still stand.

Semur Street Scene with Car, 14x11. oil 

Friday, February 14, 2020

I am Back! With another pet portrait

Jeez Louise. I knew it had been awhile since I have written a blog post but would never have guessed it has been 2 months! Yes, the holidays were in there but here it is Valentine's Day! It isn't because I have been slacking off. Well, possibly a little. I have had house guests as well.

But here I am with a commissioned painting that was finished up in the past week. It is not a normal pet portrait as it has a human in it which takes it out of the 'pet portrait' category, yet I don't want a new category as I don't want to be a portrait artist. This was commissioned by a friend as a gift to her sister for all the help and support she has provided during my friend's very long and trying divorce.

Her sister just lost her beloved dog and since she is mostly in shadow and a very simplified shape I decided to do this painting for her.
Hollie and Jill, 12x12, oil on linen panel
My main goal was to capture the contentedness of the dog, Hollie. I believe I have caught that. My instructions were to focus on the dog, it supposedly to be a dog portrait. I ended up putting more into Jill than was expected just because I wanted to show the love from her to her dog. My friend is thrilled with the painting. I am gratified to have another happy client especially since she is a friend.

I will start playing catch up and posting more regularly again. Thanks for your patience.